Is Smoked Salmon Raw? A Comprehensive Guide

– Smoked salmon can be hot smoked or cold smoked, with different temperatures and smoking times.
– Hot-smoked salmon is fully cooked, while cold-smoked salmon is only partially cooked.
– Cold-smoked salmon is cured with a salt-sugar solution and dried before smoking.
– Hot-smoked salmon is cured with a salt-sugar solution and smoked at higher temperatures.
– Smoked salmon used in sushi is considered cooked due to the smoking process.
– Smoking salmon involves exposing it to smoke from burning or smoldering materials.
– Wood is commonly used for smoking salmon, with different types of wood preferred.
– Smoked salmon is rich in protein, omega-3 fatty acids, and vitamins A, B, D, and E.
– Pregnant women should avoid consuming raw salmon due to the risk of bacteria and parasites.
– Smoking salmon provides a partial preservation effect but requires additional preservation techniques.
– Cold-smoked salmon is thinly sliced and served raw or lightly cured.
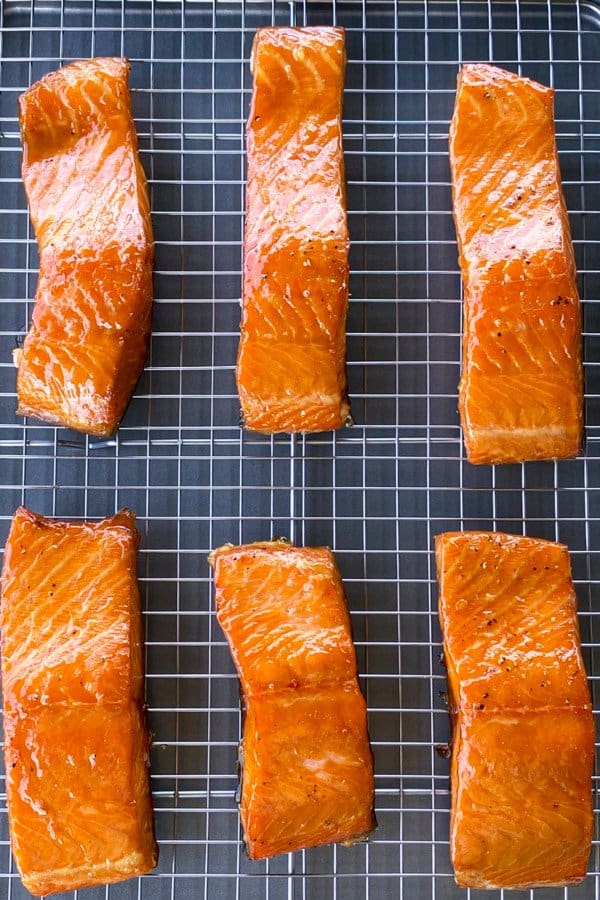
– Hot-smoked salmon has a flaky texture and a more pronounced smoky taste.
– Cold-smoked salmon has a delicate texture and a milder smoky flavor.
– Smoked salmon can be eaten fresh out of the package without further cooking.
– Smoked salmon requires proper storage to prevent bacterial growth.
– Cold-smoked salmon has a shorter shelf life compared to hot-smoked salmon.
– Unopened smoked salmon can be stored in a pantry or dark place, while refrigerated smoked salmon can be stored for up to 2 weeks.
– Smoked salmon can be frozen for 2-3 months.
– Spoiled smoked salmon can be detected by its smell, mold growth, change in color, and slimy texture.
– Smoked salmon is a good source of omega-3 fatty acids, calcium, iron, and vitamins B12, A, E, and astaxanthin.
– Enjoy smoked salmon in moderation.
– Commercially available smoked salmon should be free of parasites.
– Smoked salmon falls into the “processed meat” category, which has the potential to increase the risk of cancer.

Continue Reading

The Optimal Lasagna Internal Temp: Guidelines for Perfection

– The ideal baking temperature for lasagna is between 375°F (190°C) and 400°F (204°C).
– The recommended internal temperature for lasagna is 160°F (71°C) or higher.
– To check the temperature of the lasagna, a meat thermometer should be inserted in the middle of the dish to ensure it reaches at least 160°F (71°C).
– The lasagna is considered done when the internal temperature hits 165°F (74°C), the top is golden brown, and the edges are bubbling.
– In an oven, lasagna should be baked covered with foil at 375°F (190°C) for 25-30 minutes, then uncovered and cooked for another 25-30 minutes until the internal temperature is 160°F (71°C).
– In an air fryer, lasagna should be cooked at 360°F (182°C) for 20-25 minutes, until the top is golden and the internal temperature reaches 165°F (74°C).
– In an electric roaster, lasagna should be cooked covered with foil at 375°F (190°C) for 1 hour, then uncovered and cooked for another 15-20 minutes until golden and bubbly.
– At a temperature of 350°F (175°C), lasagna should be cooked covered with foil for 45-50 minutes, then uncovered and cooked for another 15-20 minutes until golden and bubbly.
– At a temperature of 400°F (200°C), lasagna should be cooked covered for about 20-25 minutes, then uncovered and baked again.
– The article suggests letting the lasagna rest for 15-20 minutes before cutting to allow the flavors to meld and make it easier to cut and serve.
– The ideal temperature for serving lasagna is between 150°F (65°C) and 160°F (71°C).
– The internal temperature of frozen lasagna should reach at least 165°F (74°C) to ensure any harmful bacteria are destroyed.
– To reheat frozen lasagna, the article suggests oven heating at 350°F (175°C) for 25-30 minutes, medium power heating in the microwave for 5 minutes, or air frying at 350°F (175°C) for 15-20 minutes.
– The recommended internal temperature to reheat homemade lasagna is 165°F (74°C).
– Reheating can be done in the oven by preheating to 350°F (175°C), covering the lasagna with foil, and reheating for 25-30 minutes.
– It can also be reheated in the microwave using medium power for 2-3 minutes, followed by additional 1-minute increments if needed.
– Another option is to use an air fryer by preheating it to 350°F (175°C) and reheating the lasagna covered for 15-20 minutes.
– When microwaving lasagna, the internal temperature should reach 160-165 degrees Fahrenheit.
– Using a food thermometer is important to ensure the lasagna is cooked throughout and reaches a temperature of 165 degrees Fahrenheit.
– Pre-heating the oven for 20 minutes before baking helps ensure even cooking.
– The top layer of the lasagna should be golden brown.
– Check that the sauce is bubbling on the sides to verify that it is cooked.
– A toothpick or food thermometer can be used to check the temperature of the lasagna.
– Preheating the oven to the correct temperature is important to prevent uneven cooking.
– Reheating a large lasagna is not recommended as it may not reheat evenly.
– No-boil noodles and a layer of non-stick oil on foil can speed up cooking and trap moisture.
– Toothpicks can be used to hold the foil in place.
– Add the sauce to the bottom of the lasagna after placing the foil.

Continue Reading

Dumplings vs Potstickers: Unveiling the Delicious World!

– Dumplings come in different shapes and sizes worldwide, including perogies, wontons, samosas, and gnocchi.
– Dumplings are small masses of dough cooked by boiling, steaming, frying, or simmering.
– Potstickers are a popular type of dumplings.
– Potstickers are called so because they stick to the wok when they are cooked and become crispy.
– Potstickers are typically two to three bite dumplings with a thick and soft wrapper that becomes crispy after cooking.
– They can be filled with cabbage and carrots for a vegetarian version or ground pork for a meat version.
– Potstickers are found in Chinese restaurants and the frozen aisle of grocery stores.
– The main difference between potstickers and other dumplings is that potstickers are crispy due to their cooking method.
– Overall, both potstickers and dumplings have dough on the outside and vegetable or meat filling on the inside.

Continue Reading

Electric Hot Pot: A Beginner’s Guide to Effortless Cooking

Keywords: electric hot pot, hot pot, Chinese cooking style, ingredients, broth, dinner table, Good Housekeeping Institute, Kitchen Appliances and Innovation Lab, recommendations, buy, Kitchen Appliances and Technologies Lab, director, Nicole Papantoniou, factors, purchase, cookbook author, Kristina Cho, Sarah Leung, tips, cook, home

Pertinent list of keywords:
– electric hot pot
– hot pot
– Chinese cooking style
– ingredients
– broth
– Good Housekeeping Institute
– Kitchen Appliances and Innovation Lab
– recommendations
– Kitchen Appliances and Technologies Lab
– director
– Nicole Papantoniou
– factors
– purchase
– cookbook author
– Kristina Cho
– Sarah Leung
– tips
– cook
– home

Continue Reading

How Long Does It Take for Jello to Set: A Delicious Science Experiment

– The recommended temperature for gelatin to set is approximately 34°F (1°C).
– If you don’t have a fridge, you can place the serving bowls with Jello inside an ice bath (large bowl filled with ice cubes) to set it. This method may take over 6 hours.
– The table provides the setting times for different methods: refrigeration takes 2-4 hours, freezing plus refrigeration takes 1-3 hours, and no freezing or refrigeration takes over 6 hours.
– Using the refrigerator is the best method for setting Jello as slower speed provides more heat resistance for the dessert.
– Three ways to speed up the hardening process of Jello are: using small bowls, chilling your mold in advance, and using ice cubes during preparation.
– Using ice cubes or a mixture of ice and water instead of cold water speeds up the set time to 1-1.5 hours.
– Freezing Jello for only 20 minutes and then bringing it to the fridge can also speed up the setting process, but extended freezing may cause parts of the Jello to freeze while the center remains unset.
– Some fruits like pineapple, kiwi, guava, papaya, ginger, and figs have enzymes that may prevent Jello from setting. The article discusses why jello may not set and how to fix it. It states that certain fruits, such as pineapple, kiwi, papaya, and guava, contain enzymes that inhibit gelification. It advises against using these fruits in jello if you want it to set properly. It also mentions that not following the box’s instructions, specifically dissolving the gelatin mixture in boiling water before adding cold water, can result in jello not setting. It suggests not covering the jello with plastic wrap, as this can prevent it from setting. If the jello has already been made and doesn’t set, the article suggests removing any fruit and refrigerating it for at least 5 hours to see if it will set. If the jello doesn’t contain fruit, it advises melting it in a double boiler and letting it set in the refrigerator again. The article concludes by saying that jello usually takes 2-4 hours to set in the refrigerator but can be accelerated by using ice cubes, small chilled bowls, or the freezer.
– Jello is a fruit-flavored gelatin dessert and a registered trademark of Kraft Heinz.
– It is sold in sachets and comes in different flavors.
– Jello is made with gelatin powder, sugar, and various flavorings.
– It takes 2-4 hours for jello to set in the fridge, depending on serving size.
– Extra-large jello desserts take 4-6 hours to set.
– Jello can be stored in the fridge for 7-10 days.
– Freezing jello can speed up the setting process, but it should only be frozen for 20 minutes before transferring to the fridge.
– Jello will not set properly at room temperature.
– The ratio of alcohol to non-alcoholic liquid should be maintained to not interfere with gelatin setting.

Continue Reading

Can You Eat Cinnamon Sticks? Discover Their Surprising Benefits!

– Cinnamon sticks are a natural spice made from the bark of cinnamon trees.
– It is not recommended to eat cinnamon sticks raw as they can be hard on the digestive system.
– Cinnamon sticks are dried bark that is rolled into sticks and used as a spice.
– It is generally recommended to grind cinnamon sticks into a powder or stir them into food while cooking instead of chewing on them.
– Eating too much cinnamon can cause health problems due to high levels of coumarin, a natural blood thinner that can cause liver damage.
– It is best to consume no more than one three-inch stick of cinnamon per day.
– Cinnamon sticks have health benefits, including being a good source of antioxidants and having anti-inflammatory properties.
– Cinnamon sticks can be used to make tea by infusing them in hot water.
– Cinnamon sticks can be used as natural stirrers for tea or coffee, giving a subtle cinnamon flavor and aroma.
– Adding a cinnamon stick to rice while cooking can provide a subtle cinnamon flavor and aroma.
– Cinnamon sticks can be added to slow-cooked meals or roasts for additional flavor.
– Cinnamon sticks can be used to add flavor to dishes and can be cooked with meats like beef, pork, and chicken.
– They can also be added to soup broths for a cinnamon flavor and aroma.
– Real cinnamon sticks should have a dark brown color and smooth texture.
– Real cinnamon should feel powdery and not sticky when rubbed between fingers.
– The fragrance of real cinnamon should be sweet and spicy.
– Real cinnamon should taste mildly sweet with no bitter aftertaste.
– There are no known health risks associated with eating cinnamon sticks raw, but it is not recommended.
– Cinnamon sticks can be used as a garnish for cocktails or as a home fragrance by simmering them in water.
– There are two types of cinnamon: Ceylon cinnamon and Cassia cinnamon, each with a different flavor profile.
– This article discusses alternative ways to consume cinnamon sticks instead of chewing on them.

Continue Reading

Broccoli Cuts: The Nutritional Powerhouse Nature’s Favorite

– The article provides a method for cutting broccoli florets to achieve the best-looking shape with long stems.
– Cutting off the floret stems where they meet the base is essential for beautiful broccoli florets.
– Very large broccoli florets should be sliced in half for more even cooking.
– The stalk of the broccoli can also be cut and used in recipes or as a dip.
– The article also recommends some chef knives, cutting boards, and a knife sharpener.
– There are links to broccoli recipes at the end of the article.
– The article provides instructions on how to cut broccoli in a specific way to achieve the best-looking florets with long stems and an elegant shape.
– The ingredients needed are 1 1/2 pounds of broccoli (3 large heads).
– The instructions advise using a large chef’s knife to cut off the broccoli floret at the point where its stem meets the larger stalk, leaving the stem long.
– For very small broccoli pieces, the stem can be cut shorter.
– Any very large florets should be separated by cutting the base of the stem in half and pulling the floret apart with fingers.
– The florets should be as similar in size as possible for even cooking.
– The article also suggests eating the broccoli stalk by slicing off the irregular outer skin on all 4 sides and cutting the remaining stalk into long matchsticks.
– The article is focused on knife skills for cutting broccoli.
– The article provides a tutorial on how to cut broccoli into uniform pieces for cooking.
– Cutting the broccoli into uniform pieces helps it cook evenly.
– For roasting, cut the florets into 1 to 1 1/2-inch pieces.
– For blanching or making salads, smaller pieces may be preferred.
– When buying broccoli, choose bright green stalks without yellowing florets or brown spots. It should feel heavy.
– Fresh broccoli should be washed right before use to prevent mold growth.
– Whole broccoli can be stored in an open bag in the refrigerator, while cut florets should be stored in an airtight container for up to 5 days.
– Blanching broccoli before freezing is recommended, and it can be stored for up to nine months.
– 2 pounds of broccoli will yield about 12-14 cups of chopped broccoli, which will cook down to about 8 cups of roasted broccoli.

Continue Reading

Can You Eat Lamb Rare? Know the Risks for Optimal Safety!

– Lamb can be eaten rare if the exterior is cooked and the surface bacteria is killed off
– Use a meat thermometer to check for doneness and aim for an internal temperature of 120-125 degrees Fahrenheit (50 degrees Celsius)
– Let the lamb rest for five minutes after cooking to reach a final internal temperature of 128-130 degrees Fahrenheit
– It is not recommended to eat rare lamb leftovers because they may have bacteria picked up during storage
– Leftover lamb should be reheated to at least medium doneness to reduce the chances of consuming bacteria
– Eating raw lamb is not advisable due to food safety concerns, although some people enjoy lamb tartare
– If making lamb tartare, it is important to use high-quality, previously frozen lamb and ensure cleanliness during preparation
– Common foodborne pathogens associated with undercooked lamb include E. Coli, Salmonella, Staphylococcus aureus, Norovirus, and Campylobacter
– Proper cooking, such as searing the lamb, helps remove bacteria from the outer surface

Continue Reading

The Best Beans for Chili: A Guide to Choosing the Perfect Legumes for Hearty and Flavorful Recipes

Based on the given text, the pertinent list of best beans for chili would include:

1. Kidney beans
2. Black beans
3. Pinto beans
4. Great Northern beans (for white chili)
5. Cannellini beans (for white chili)

Please note that the text does not provide specific information about the “best” beans for chili, but it does mention these types of beans as commonly used in chili recipes.

Continue Reading

Is Corningware Oven Safe? A Comprehensive Guide

List of Pertinent Information for Keyword: ‘is corningware oven safe’

– Most CorningWare cookware is oven-safe and can be used in various types of ovens, including convection, conventional, toaster, and microwave ovens.
– CorningWare cookware can also be used on the range top, in a broiler, freezer, and dishwasher.
– The maximum heat tolerance of CorningWare cookware ranges between 400 to 450 degrees Fahrenheit.
– Glass-ceramic ware is the best type for oven use, but stoneware and other ovenware can also be used.
– Vintage CorningWare products may not be oven-safe, so it’s important to check the product label and manufacturer’s recommendation.
– Different CorningWare products have different heat tolerances, with some only able to withstand heat up to 425 degrees Fahrenheit, which is considered unsafe for broiler use.
– CorningWare glass lids can tolerate temperatures inside the oven of up to 450 degrees Fahrenheit.
– It is recommended to preheat the oven below 350 degrees Fahrenheit before putting bakeware with a glass lid inside to prevent thermal shock.
– When using a glass lid inside the oven above its maximum heat tolerance, it may break.
– Use aluminum foil instead of a glass lid when placing a dish with a glass lid inside the freezer.
– CorningWare cookware is versatile and can be used in the oven, freezer, microwave, stovetop, and dishwasher.
– It can be used on gas, electric, and ceramic stovetops and retains heat well, allowing for lower heat usage.
– Caution should be exercised when using CorningWare in the microwave as it may become hot.
– Wooden, plastic, or nylon utensils should be used to avoid scratching the cooking surface.
– Nylon or plastic cleaning pads and non-abrasive cleaners like CorningWare Cleaner and Conditioner are recommended for cleaning.
– Avoid using CorningWare for deep frying, making popcorn, caramelizing sugar, or making candy.
– Do not heat an empty CorningWare dish in the microwave and avoid using cracked, chipped, or broken cookware and glass lids for cooking.
– Use a countertop or trivet mat when placing hot CorningWare on the table or countertop.
– CorningWare products, including the best-selling 10-piece set of French White Ceramic Bakeware, are available for purchase on Amazon.

Continue Reading